Phpspreadsheet, mPDF를 사용해 PDF 문서 저장하기 | Windows
개요
여기서는 Windows 환경에서 PHP Composer를 이용해 Phpspreadsheet와 mPDF를 설치하고, PDF 문서를 생성, 저장하는 방법에 대해 정리해보겠습니다. (Phpspreadsheet는 PHPExcel의 업그레이드 버전입니다.)

composer.json 생성
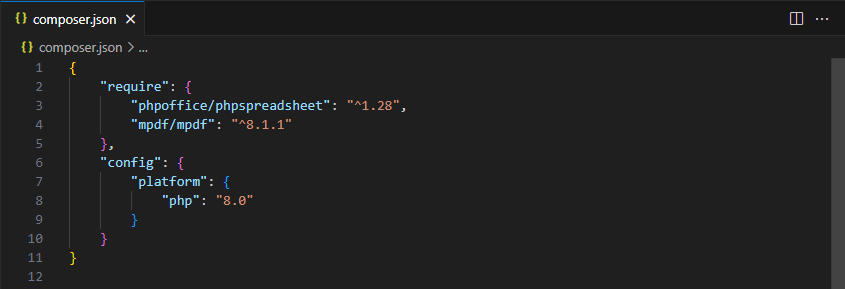
Composer로 Phpspreadsheet와 mPDF를 설치하기 위한 설정 파일인 composer.json 파일을 아래와 같이 생성합니다.
  {
    "require": {
        "phpoffice/phpspreadsheet": "^1.28",
        "mpdf/mpdf": "^8.1.1"
    },
    "config": {
        "platform": {
            "php": "8.0"
        }
    }
}
설치
아래 명령어를 사용해 Phpspreadsheet와 mPDF 패키지를 설치합니다.
> composer install
오류 상황 - 1
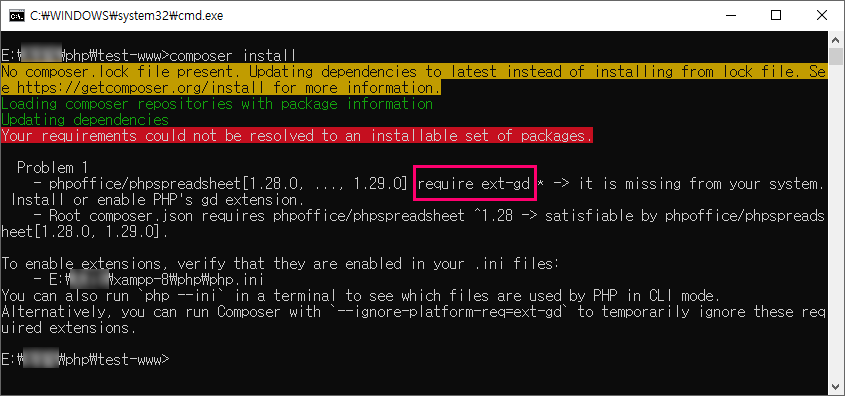
설치를 시도하면 아래와 같이 오류가 발생하는 경우가 있습니다.
Problem 1: require ext-gd * -> it is missing from your system. Install or enable PHP’s gd extension.
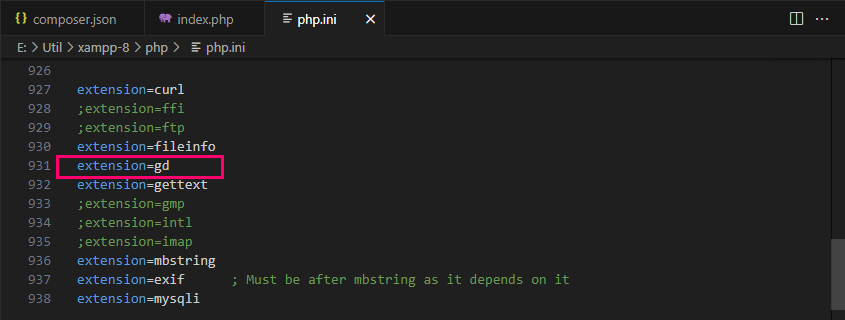
- [php.ini]를 열어서 아래와 같이 [extension=gd] 항목의 주석을 해제하고 저장합니다.
extension=gd
오류 상황 - 2
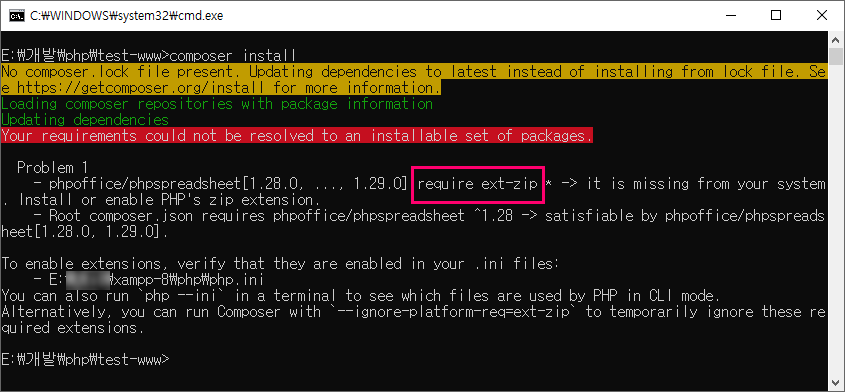
위 문제를 해결하고 다시 설치를 시도하면 아래와 같이 다시 오류가 발생하는 경우가 있습니다.
Problem 1: require ext-zip * -> it is missing from your system. Install or enable PHP’s zip extension.
- [php.ini]를 열어서 아래와 같이 [extension=zip] 항목의 주석을 해제하고 저장합니다.
extension=zip

설치 완료
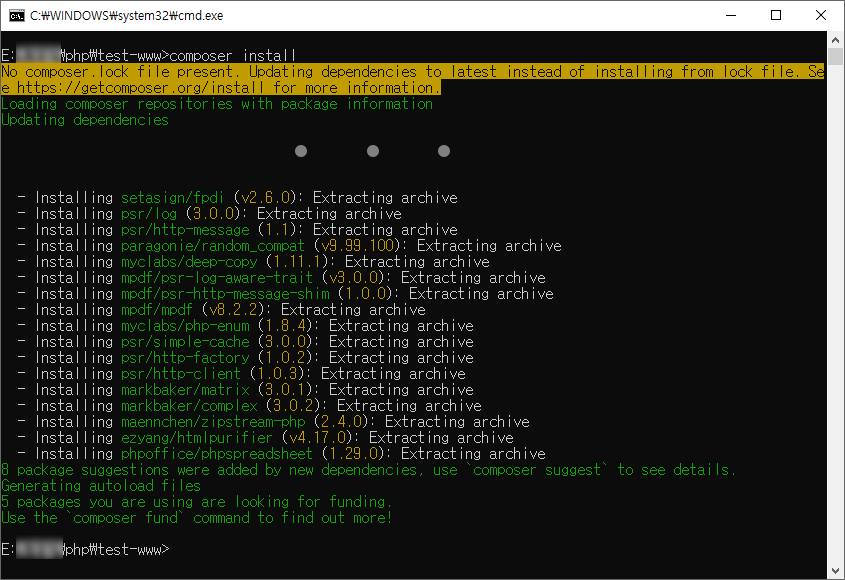
문제를 모두 해결하면 아래와 같이 [Phpspreadsheet]와 [mPDF] 그리고 각각의 패키지와 연관된 패키지까지 함께 설치됩니다.
  - Installing setasign/fpdi (v2.6.0): Extracting archive
- Installing psr/log (3.0.0): Extracting archive
- Installing psr/http-message (1.1): Extracting archive
- Installing paragonie/random_compat (v9.99.100): Extracting archive
- Installing myclabs/deep-copy (1.11.1): Extracting archive
- Installing mpdf/psr-log-aware-trait (v3.0.0): Extracting archive
- Installing mpdf/psr-http-message-shim (1.0.0): Extracting archive
- Installing mpdf/mpdf (v8.2.2): Extracting archive
- Installing myclabs/php-enum (1.8.4): Extracting archive
- Installing psr/simple-cache (3.0.0): Extracting archive
- Installing psr/http-factory (1.0.2): Extracting archive
- Installing psr/http-client (1.0.3): Extracting archive
- Installing markbaker/matrix (3.0.1): Extracting archive
- Installing markbaker/complex (3.0.2): Extracting archive
- Installing maennchen/zipstream-php (2.4.0): Extracting archive
- Installing ezyang/htmlpurifier (v4.17.0): Extracting archive
- Installing phpoffice/phpspreadsheet (1.29.0): Extracting archive
PDF 저장 설정
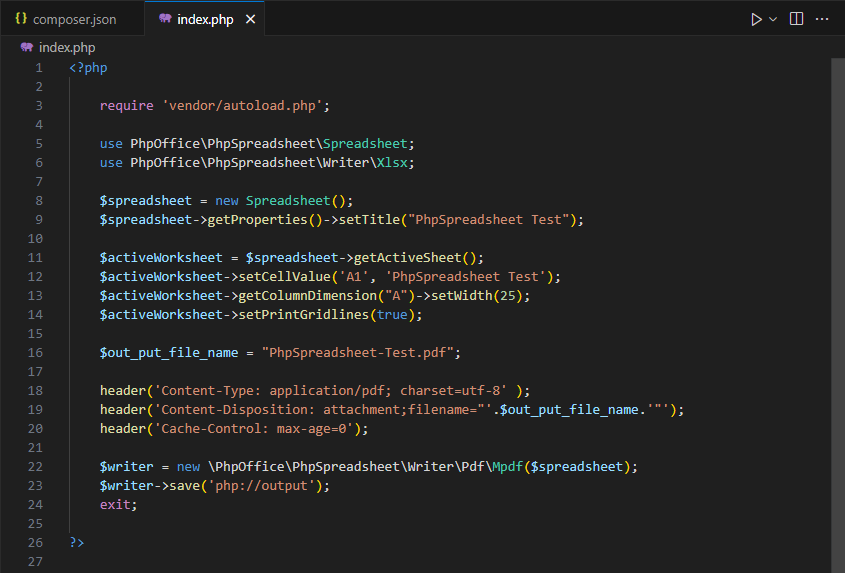
패키지가 모두 설치되었으면 아래와 같은 샘플 코드를 작성하고 페이지를 호출합니다.
  <?php

    require 'vendor/autoload.php';

    use PhpOffice\PhpSpreadsheet\Spreadsheet;
    use PhpOffice\PhpSpreadsheet\Writer\Xlsx;

    $spreadsheet = new Spreadsheet();
    $spreadsheet->getProperties()->setTitle("PhpSpreadsheet Test");

    $activeWorksheet = $spreadsheet->getActiveSheet();
    $activeWorksheet->setCellValue('A1', 'PhpSpreadsheet Test');
    $activeWorksheet->getColumnDimension("A")->setWidth(25);
    $activeWorksheet->setPrintGridlines(true);

    $out_put_file_name = "PhpSpreadsheet-Test.pdf";

    header('Content-Type: application/pdf; charset=utf-8' );
    header('Content-Disposition: attachment;filename="'.$out_put_file_name.'"');
    header('Cache-Control: max-age=0');

    $writer = new \PhpOffice\PhpSpreadsheet\Writer\Pdf\Mpdf($spreadsheet);
    $writer->save('php://output');
    exit;

?>
PDF 파일 확인
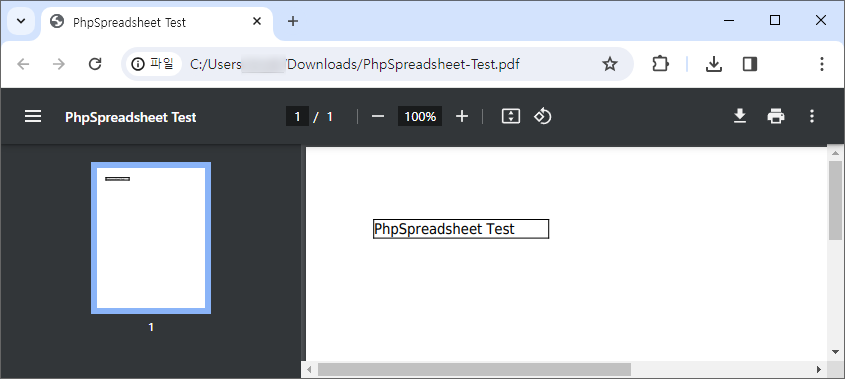
아래와 같이 PDF 파일이 다운로드되는 것을 확인할 수 있습니다.
참고 URL
-
Phpspreadsheet 공식 가이드
https://phpspreadsheet.readthedocs.io/ -
Composer 공식 홈페이지
https://getcomposer.org/ -
Composer 한글 메뉴얼
https://xpressengine.github.io/Composer-korean-docs/
문서 업데이트 내역
| 날짜 | 내용 |
|---|---|
| 2023-12-21 | 문서 최초 생성 |